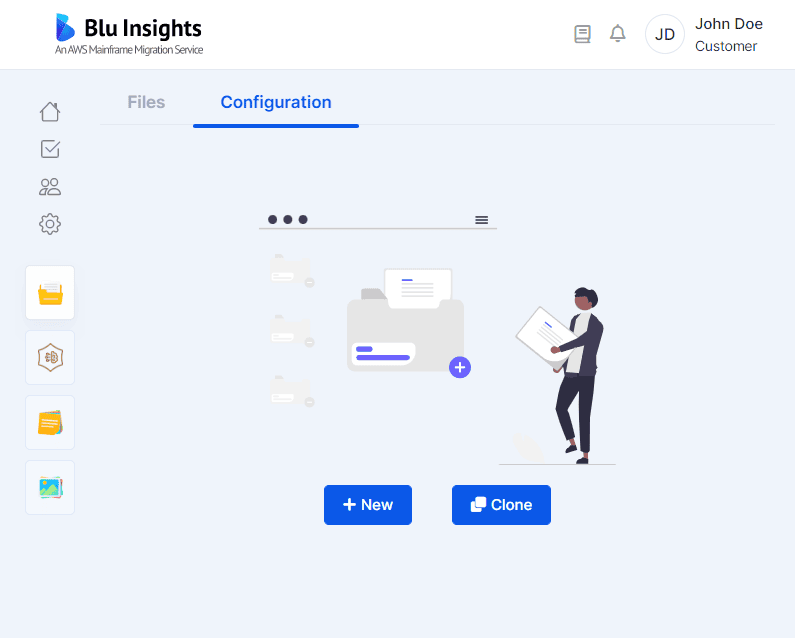
Configuration
In order to maximize your transformation impact, all actions can be configured through the Configuration section.
General
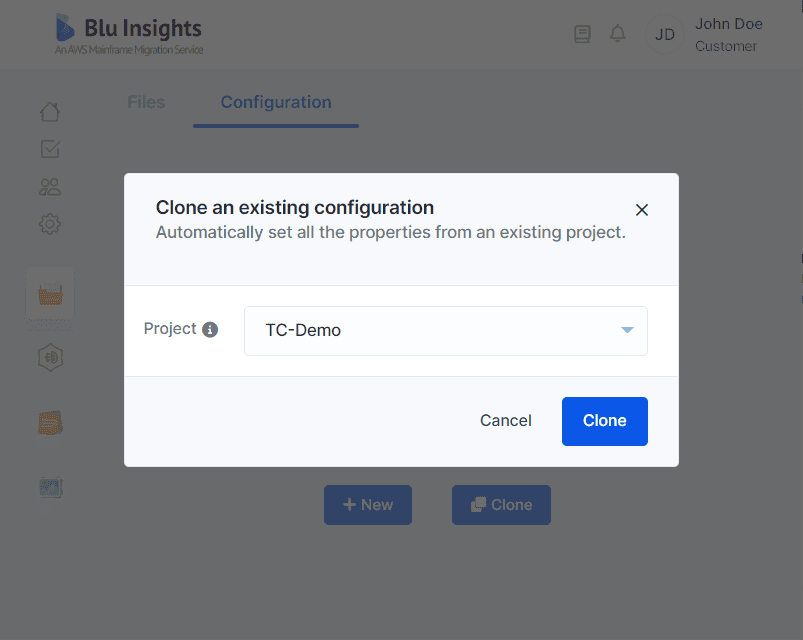
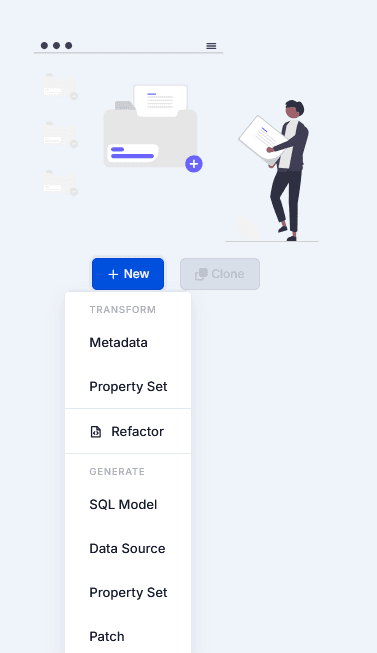
When the Transformation Center is first created, no configuration is present in your project. To configure, click on “New” button if you want to create a new configuration or on “Clone” button to clone an existing one from another project. The “Clone” feature will be available only if you haven’t any configuration.
- To create a new configuration, select which of the actions you want to start with.
- To clone an existing configuration, select the project you want to clone the configuration from.
You will edit and add other configuration elements after this first step.
Transform configuration
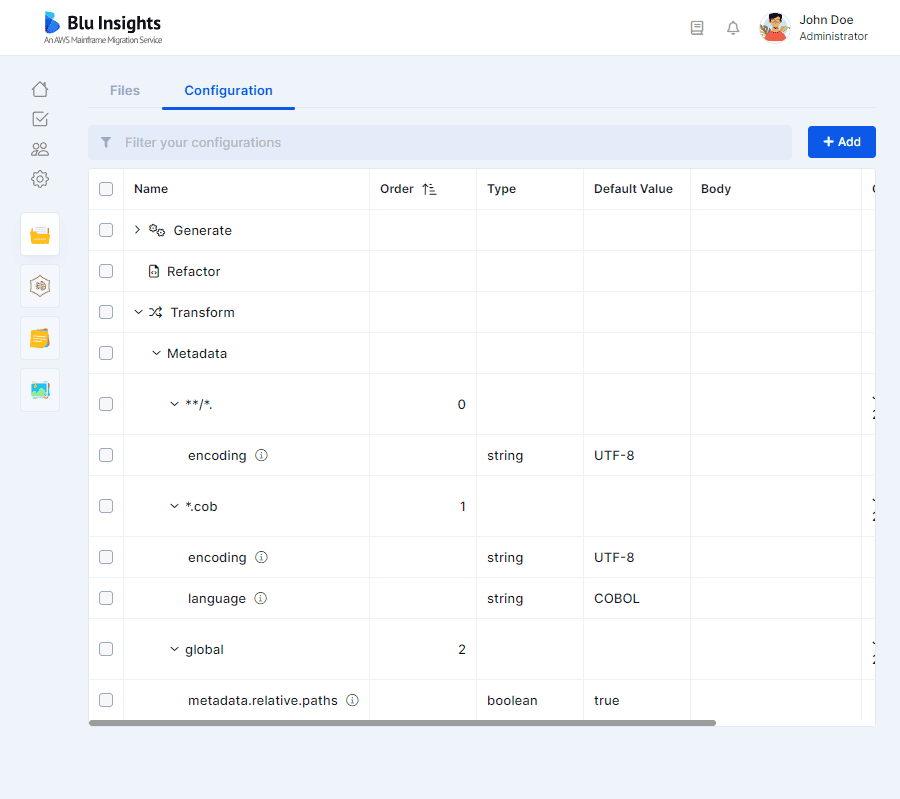
Metadata
This feature allows you to configure the metadata.ini file, which will be consumed by the Transform action and provides information about the inputs you provide for the transformation (types, encoding, etc…).
You will be able to provide custom values for the global section of this file as well as create entirely custom sections.
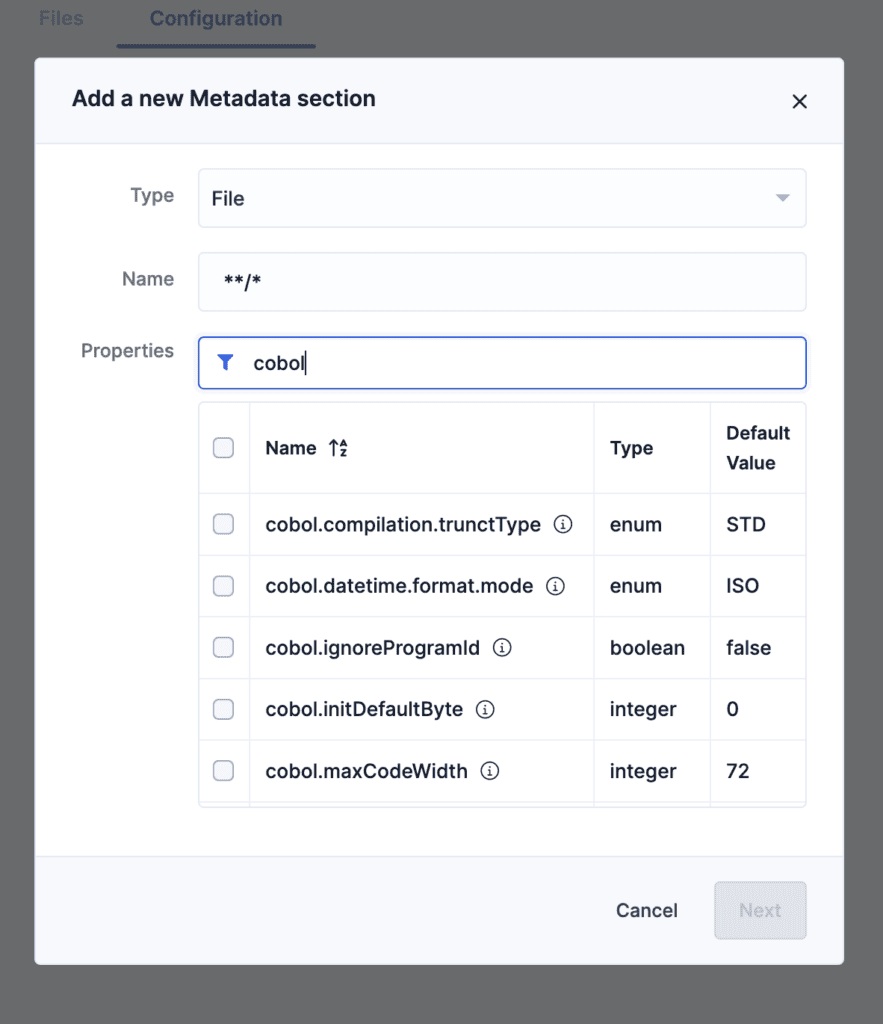
Creating a new Metadata configuration starts by providing a new section. There are two metadata section types :
- File : This section will create a configuration for a set of properties related to the files targeted by the wildcard you will provide as a name. The name has to follow Apache Ant patterns. Note that the section name has to begin with
**/even if you folder is located at the root of the project. Here, some examples:- File section named
**/COB/**will be applied to all the files located on the COB folder. - File section named
**/*.cobwill be applied to all the files with cob extension. - File section named
**/helloWorld.cobwill be applied to the file helloWorld.cob.
- File section named
- Global : This section will create a configuration for a set of generic properties related to the project as a whole, specifying some important aspects of your inputs.
For both section types, you will have to provide a name, whether it is the desired wildcard for a File type or “global” for the Global section. Then, depending on the chosen type, the related properties will be displayed and you will be able to choose which ones you want to import in your configuration to be overridden. The other ones will be used with their default values when the Transform action is launched. A tooltip is present next to each property to explain its behavior and scope.
When your choice is made, click on the “Next button.
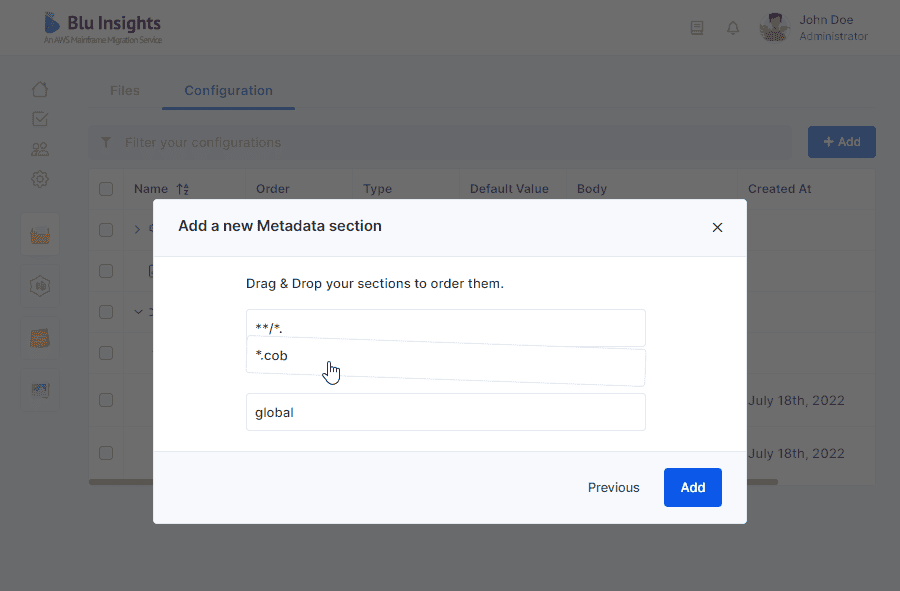
Once you have named the section and select properties, you will be able to order sections simply dragging and dropping them at the position you want in the list. Once all the sections are ordered, just click the “Add button” to complete the creation. The order of the sections is significant because it will be kept in the metadata.ini file. While this file is red by Velocity, the first valid section for a file is used, and the others are discarded. It is not cumulative. In consequence, you might need to order your sections to ensure they will not override each other.
On the configuration table, you will be able to add other values to be overridden by clicking on the “Add” button and selecting the Transform/Metadata menu. Note that you can click on the “Order” column to sort sections by order to have a preview of how they will appear in the generated metadata file.
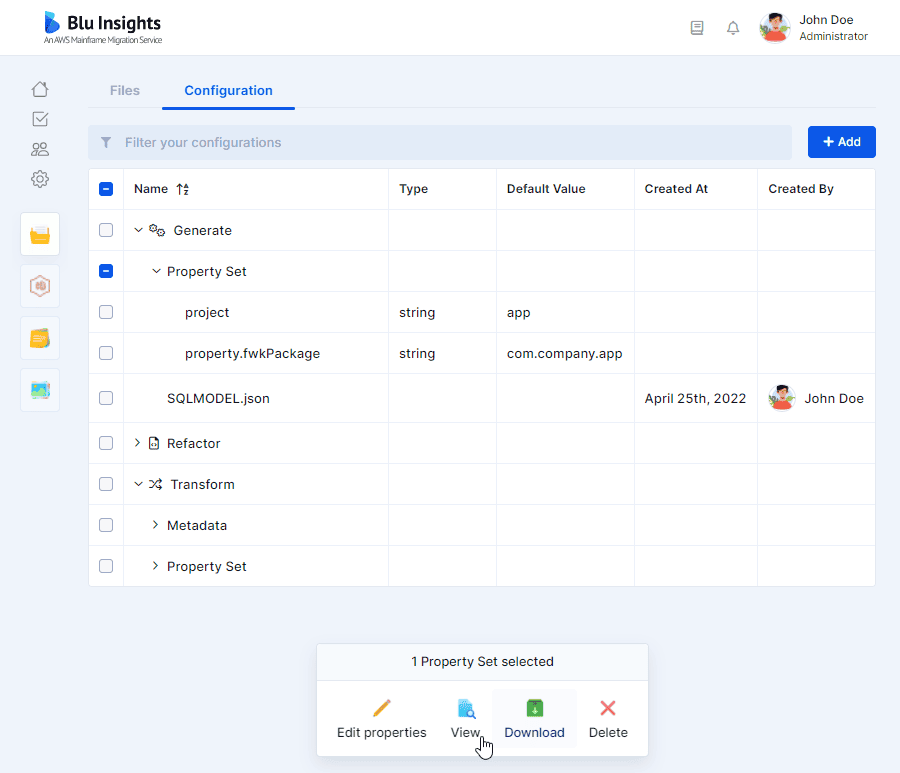
You can change the value of a property by selecting it on the table, then clicking on the “Edit properties” button at the bottom. You will be asked to write the new value, then click on the “Update” button.
You can have a preview of the file, as it will be consumed by the Transform action, by clicking on the Transform/Metadata element on the table, then on the “View” button. A read-only editor will be displayed with the content on the configuration file.
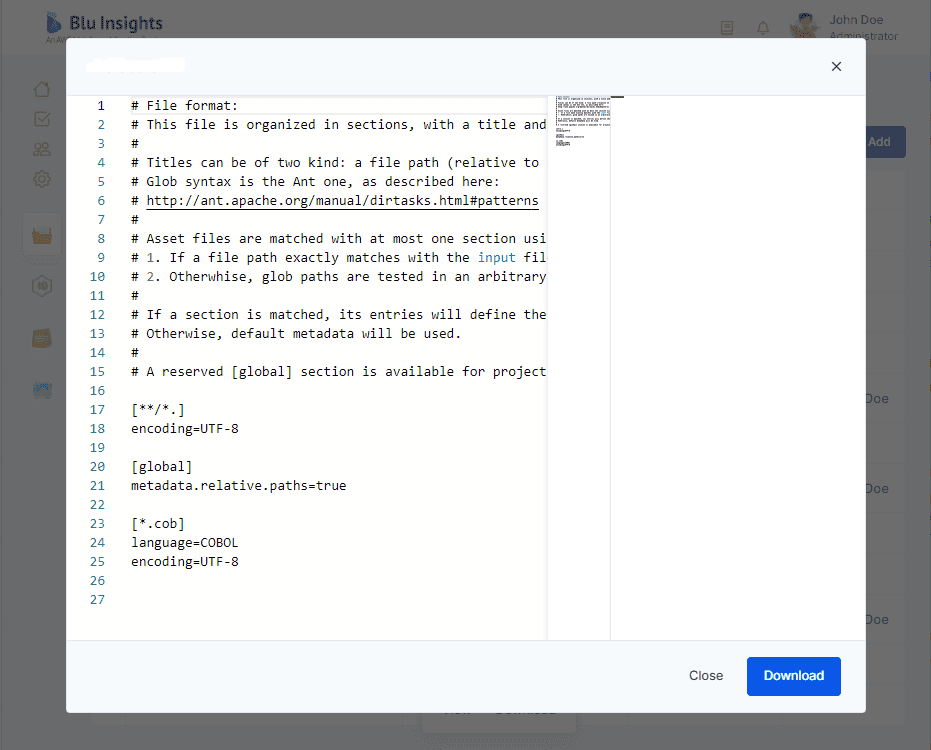
You can also download the resulting configuration file by clicking on the “Download” button.
Property Set
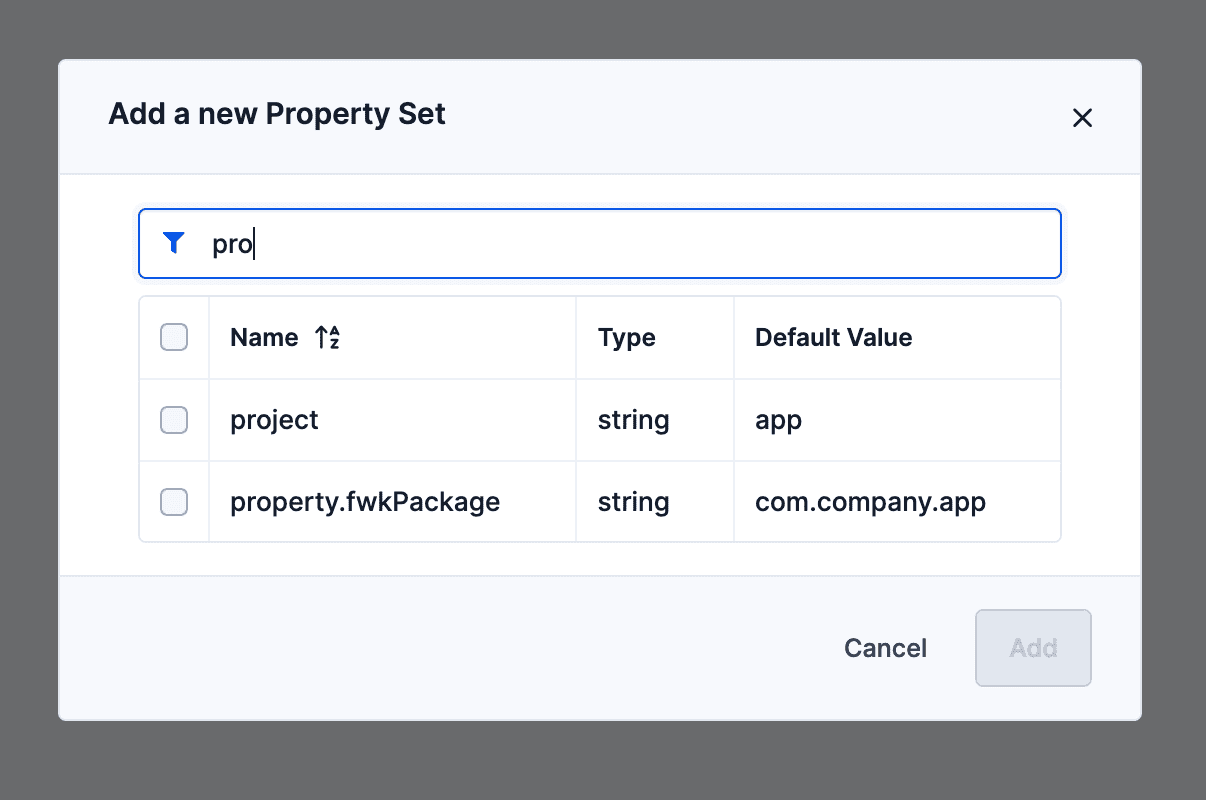
This feature allows you to configure the global behavior of the Transform action, by specifying a set of pre-configured properties.
You can start configuring them by selecting the “Transform/Property Set” menu of the “Add” button. A pop-up will appear displaying the available properties to be customized for this action, with a tooltip next to each one of them to explain its behavior and scope.
You will be able to choose which ones you want to import in your configuration to be overridden. The other ones will be used with their default values when the Transform action is launched.
When your choice is made, click on the “Add” button.
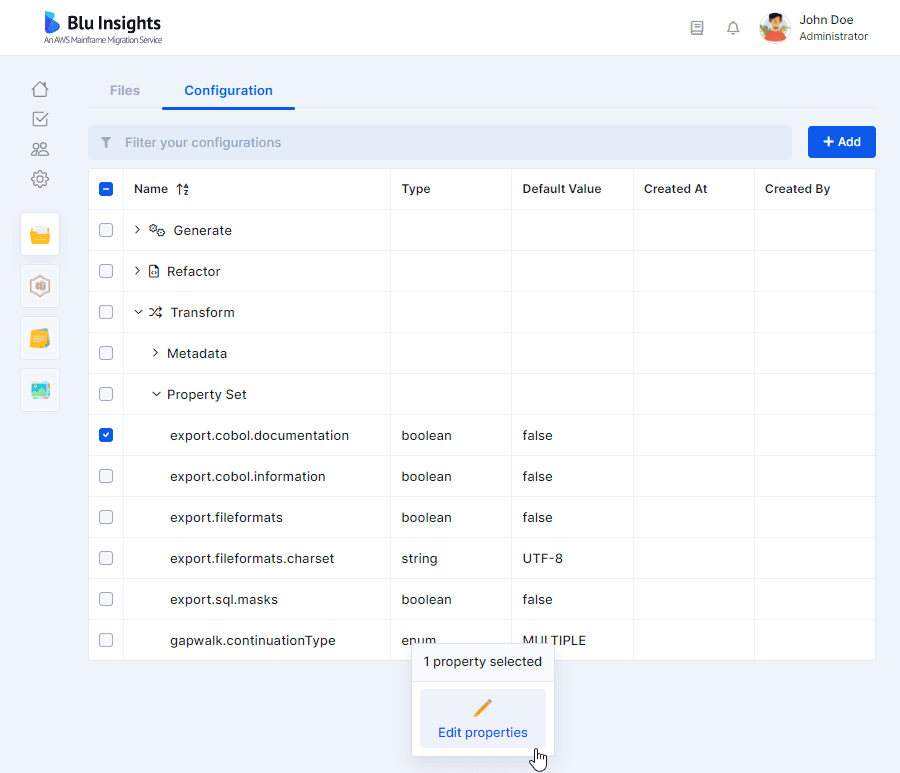
On the configuration table, you will be able to add other values to be overridden by clicking on the “Add” button and selecting the “Transform/Property Set” menu.
You can change the value of a property by selecting it on the table, then clicking on the “Edit properties” button at the bottom. You will be asked to write the new value, then click on the “Update” button.
You can have a preview of the file, as it will be consumed by the Transform action, by clicking on the Transform/Property Set element on the table, then on the “View” button. A read-only editor will be displayed with the content on the properties file.
You can download the resulting properties file by clicking on the “Download” button.
You can also delete a property be selecting it and clicking on the “Delete” button. This will reset its value to the default one, when the action is launched. Deleting the whole “Transform/Property Set” section will reset all properties to their default values.
Refactor configuration
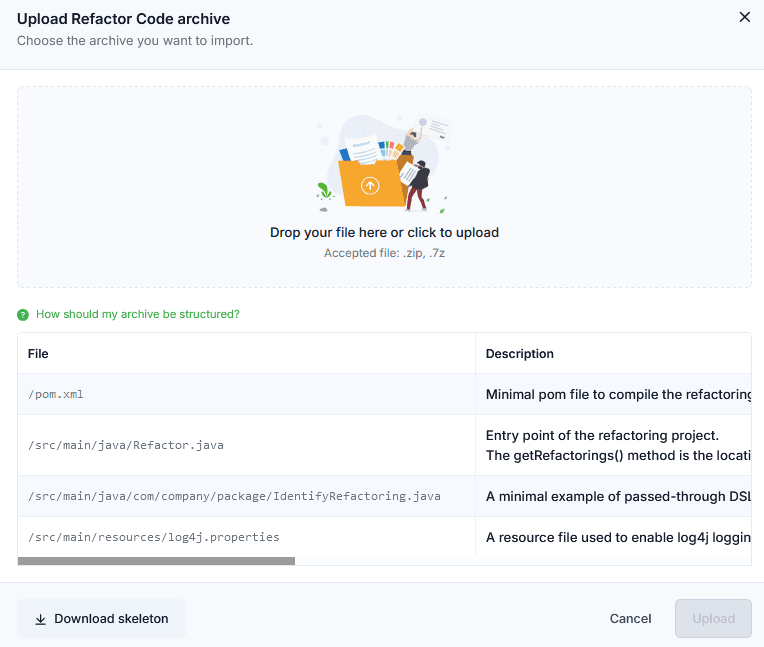
This feature allows you to configure how to refactor (adapt/change) artifacts generated by the Transform action. To do so, you need to upload an archive (Zip/7z) containing a Java project organized according to a specific structure. The following guide will walk you through the configuration process and requirements.
Accessing the Refactor Function
To begin the refactor configuration process: Navigate to the "Configuration" tab in the Inputs module. Click on "New" and then select "Refactor" from the menu.
Uploading an Archive
Select an archive that follows the structure bellow and click on upload:
| File | Description |
| /pom.xml | Minimal pom file to compile the refactoring project locally. |
| /src/main/java/Refactor.java | Entry point of the refactoring project. The getRefactorings() method is the location in which to register your custom refactorings. Use the IdentityRefactoring example to register yours. |
| /src/main/java/com/company/package/IdentifyRefactoring.java | A minimal example of passed-through DSL refactoring. Use it as an example to create yours. |
| /src/main/ressource/log4j.properties | A resource file used to configure log4j logging while debugging your refactoring project locally. |
You can either download the project skeleton as a template, or directly upload your archive that follows the required structure.
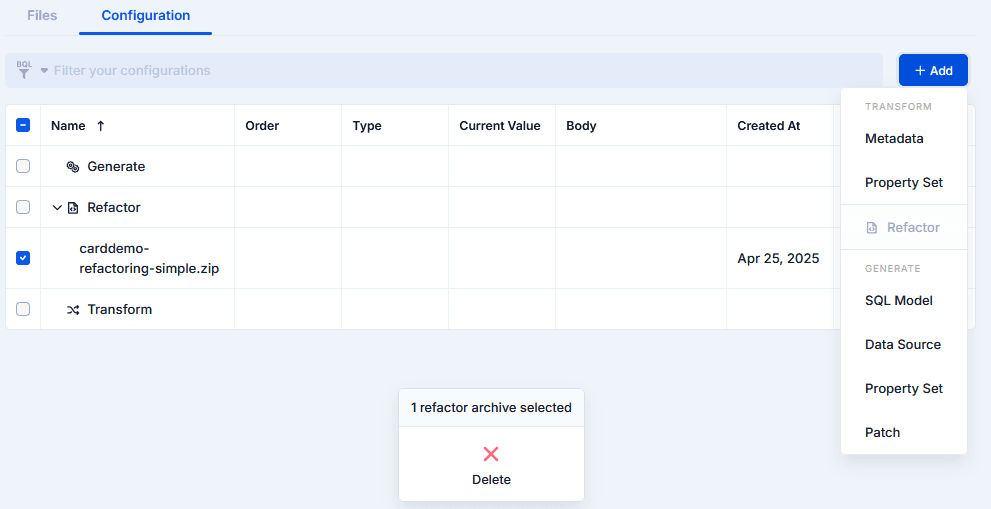
Managing Existing Archives
To upload a new archive, first delete any existing one from the configuration table by selecting it and clicking “Delete”. Then click “Add” to upload your new one.
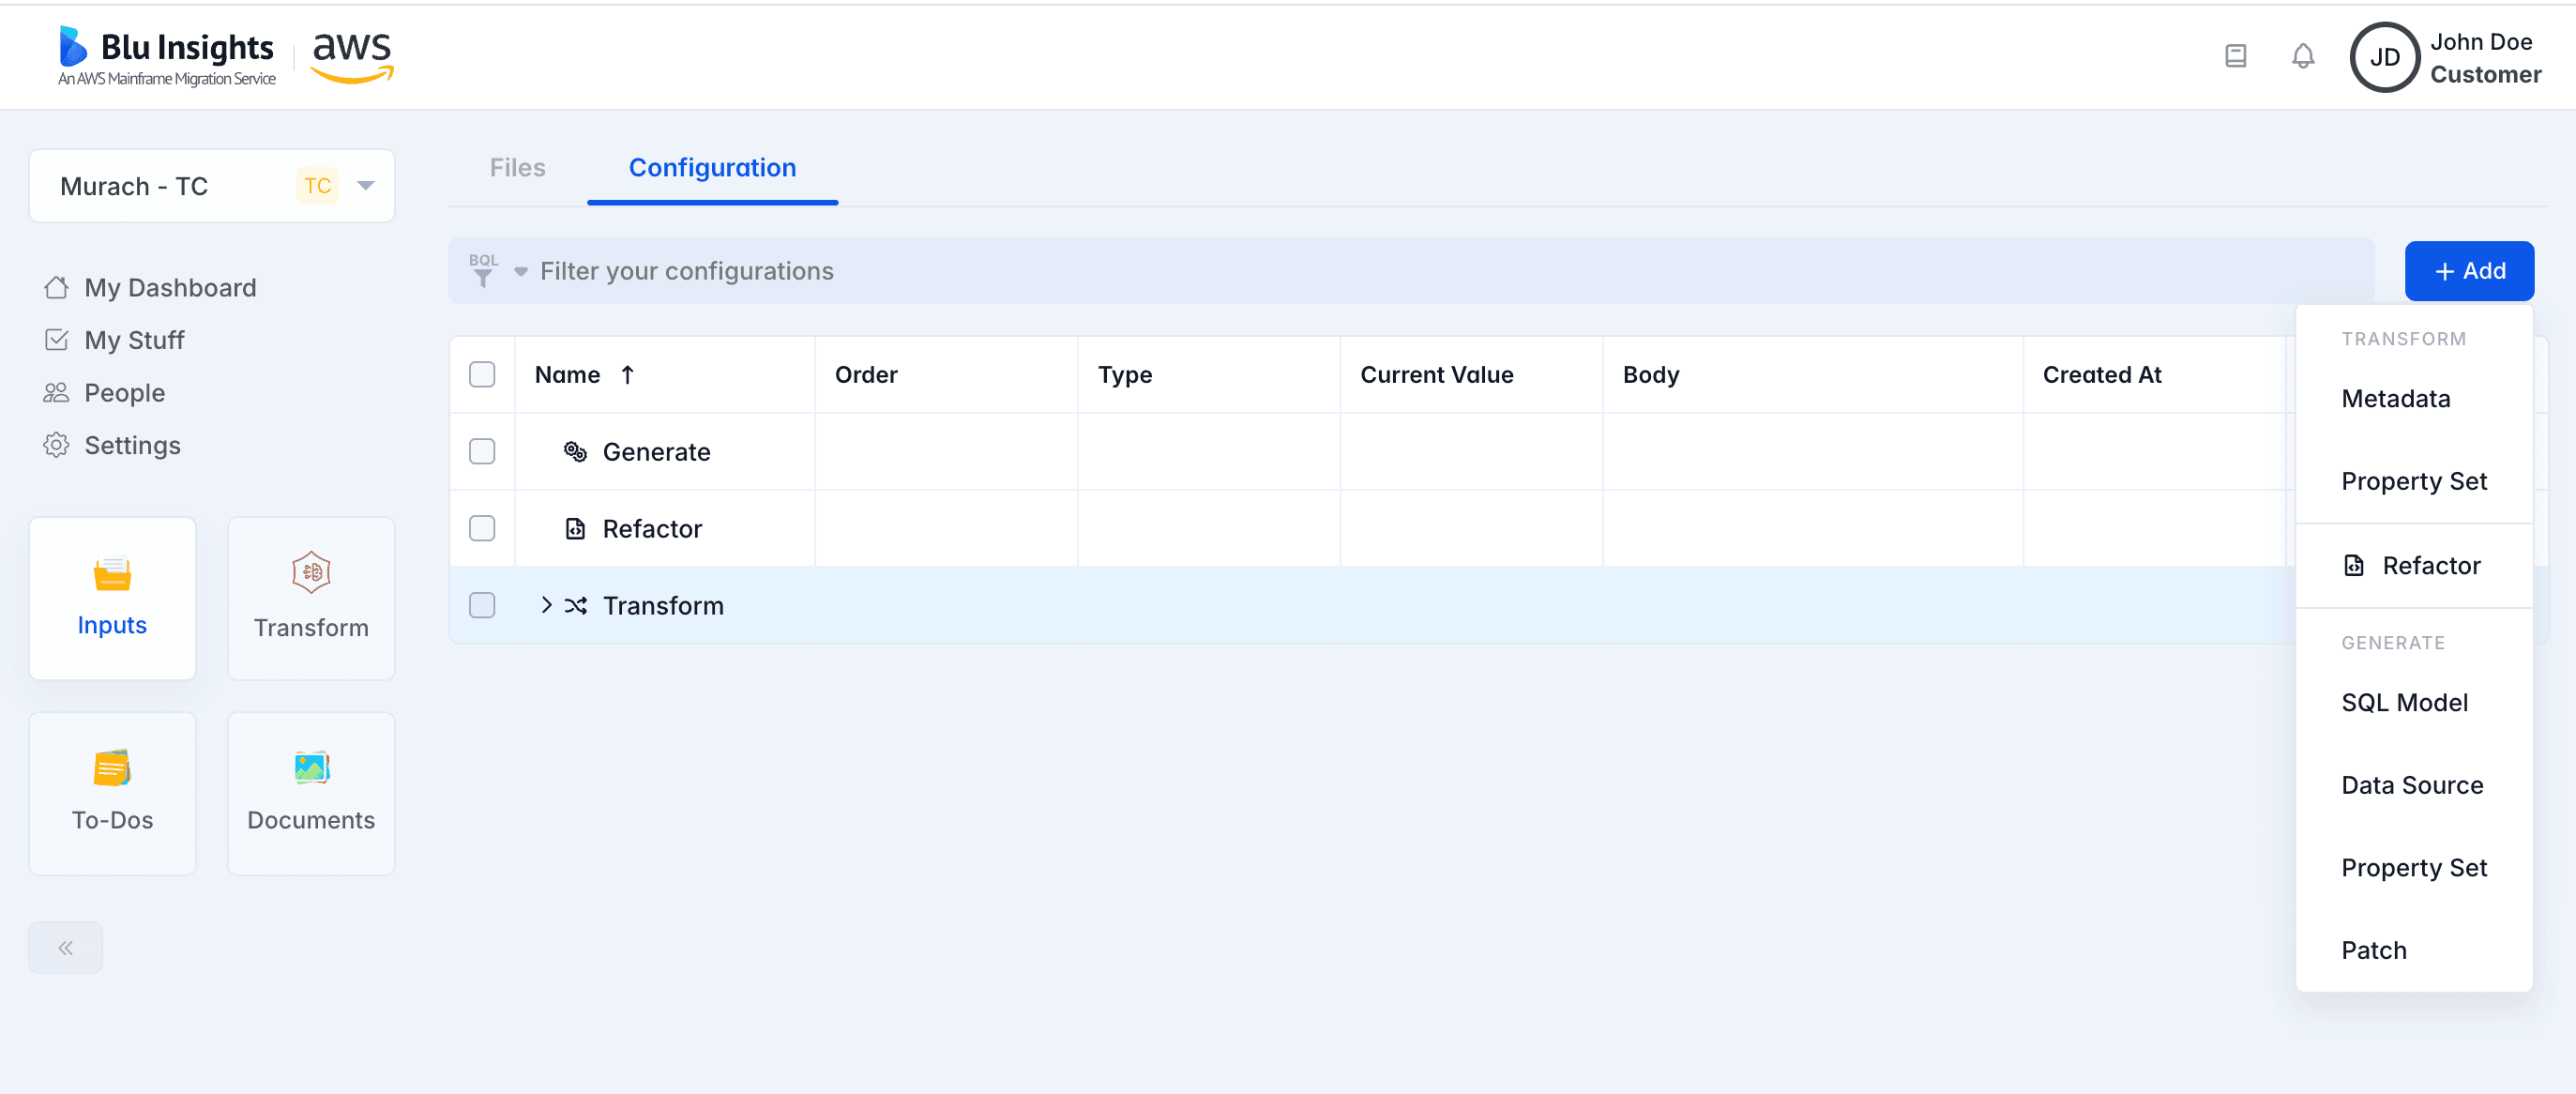
Generate configuration
SQL Model
The SQL model file is used by the Generate action to provide useful information regarding the DB2 elements of your inputs. This file is not mandatory to run a Generate action but this process greatly relies on its content to improve the quality of the generating code, especially while executing database operations.
This file is generated by the Transform action when importing your legacy SQL elements, and you can provide it as a configuration here to be consumed on the next transformation phase by clicking on the “Generate/SQL Model” menu of the “Add” button.
You can then drop your JSON file or click on the displayed pop-up to select the file to upload from your computer. When the file is chosen, you can click on the “Upload” button.
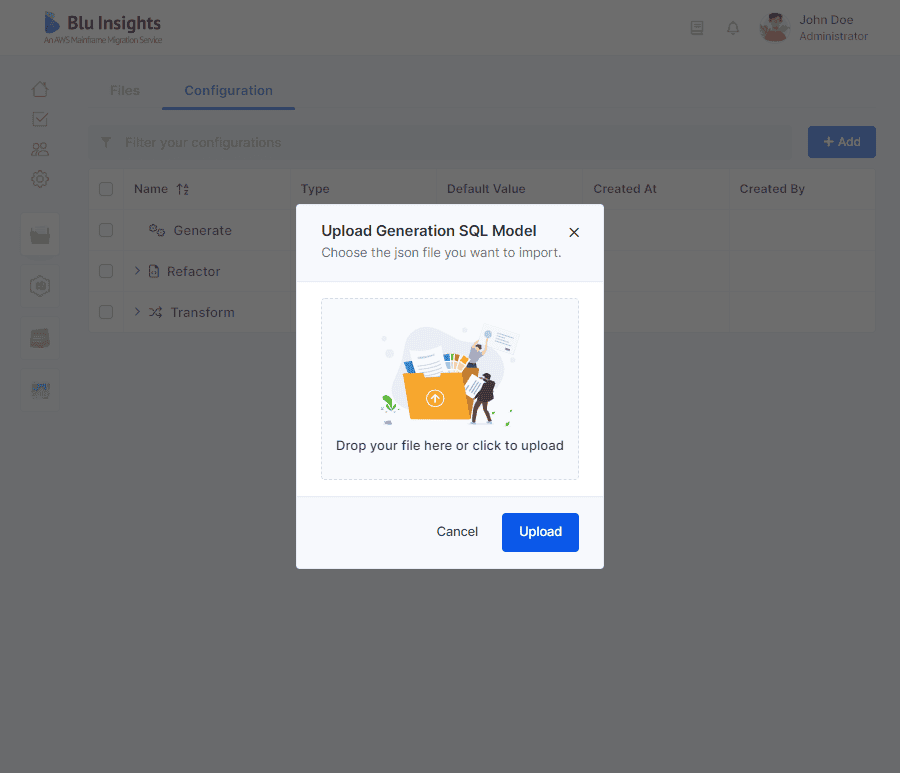
Selecting the JSON file in the configuration, allows users to delete it or view it.
Property Set
This feature allows you to configure the global behavior of the Generate action, by specifying a set of pre-configured properties.
You can start configuring them by selecting the “Generate/Property Set” menu of the “Add” button. A pop-up will appear displaying the available properties to be customized for this action, with a tooltip next to each one of them to explain its behavior and scope.
You will be able to choose which ones you want to import in your configuration to be overridden. The other ones will be used with their default values when the Generate action is launched.
When your choice is made, click on the “Add” button.
On the configuration table, you will be able to add other values to be overridden by clicking on the “Add” button and selecting the “Generate/Property Set” menu.
You can change the value of a property by selecting it on the table, then clicking on the “Edit properties” button at the bottom. You will be asked to write the new value, then click on the “Update” button.
You can have a preview of the file, as it will be consumed by the Generate action, by clicking on the Generate/Property Set element on the table, then on the “View” button. A read-only editor will be displayed with the content on the properties file.
You can download the resulting properties file by clicking on the “Download” button.
You can also delete a property be selecting it and clicking on the “Delete” button. This will reset its value to the default one, when the action is launched. Deleting the whole “Generate/Property Set” section will reset all properties to their default values.
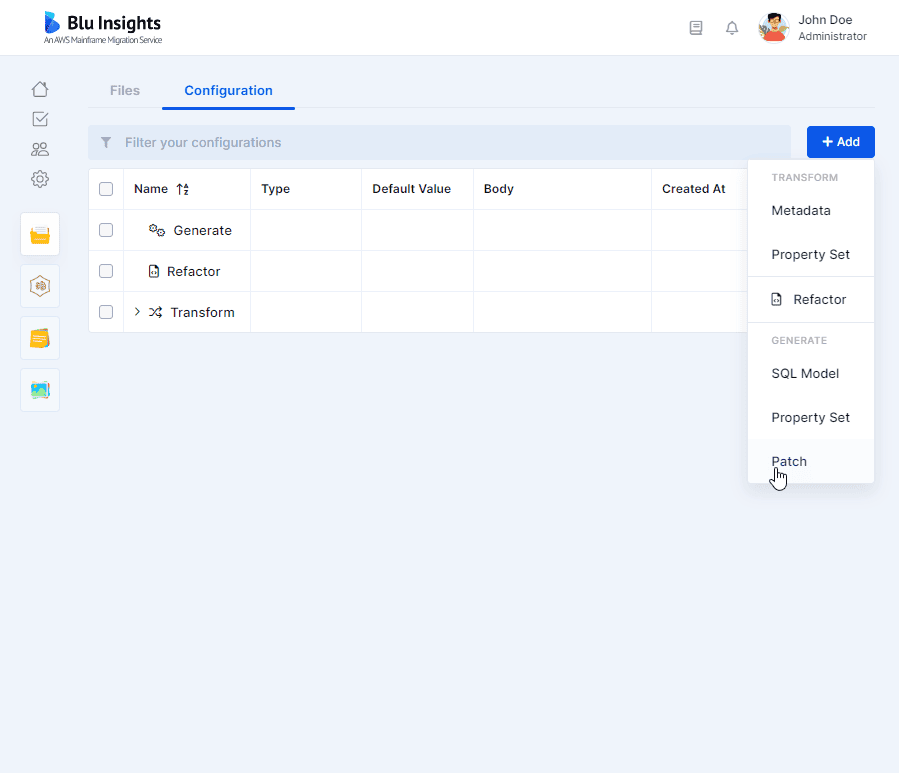
Velocity Patches
This feature allows you to create Java patches to apply to your legacy inputs. You can start configuring them by selecting the “Generate/Patch” menu of the “Add” button.
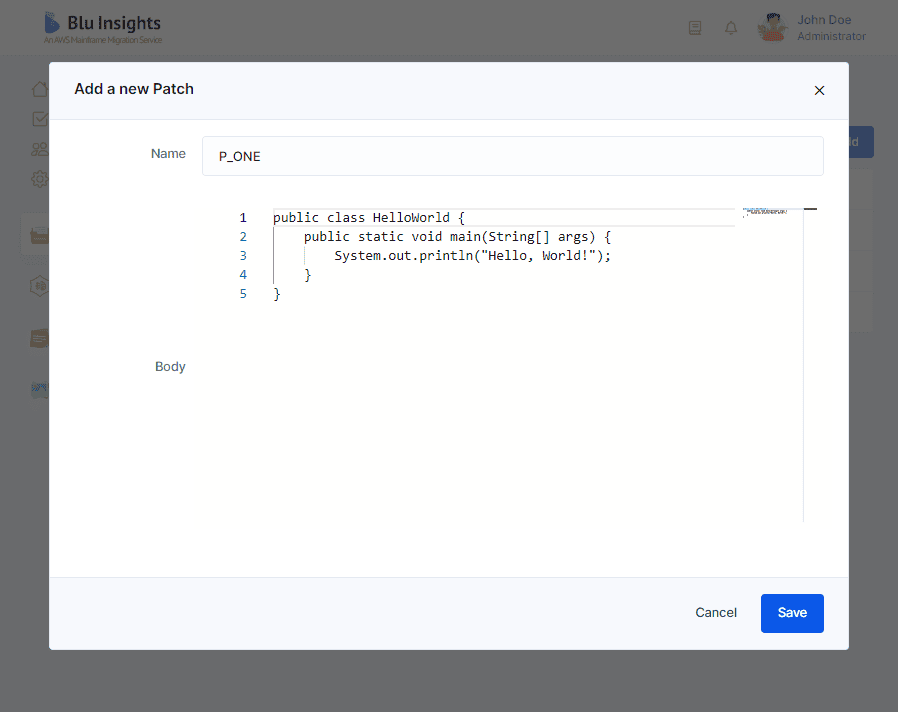
A pop-up will appear to create a new patch, which needs two information:
- name: a unique identifier to target the patch when inserting the patch tags in the legacy input;
- body: the body with which to replace the generated code.
When these two information has been filled, click on “Save” to create the patch.
You can see your newly created patch under the “Generate/Patch” section of the configuration table.
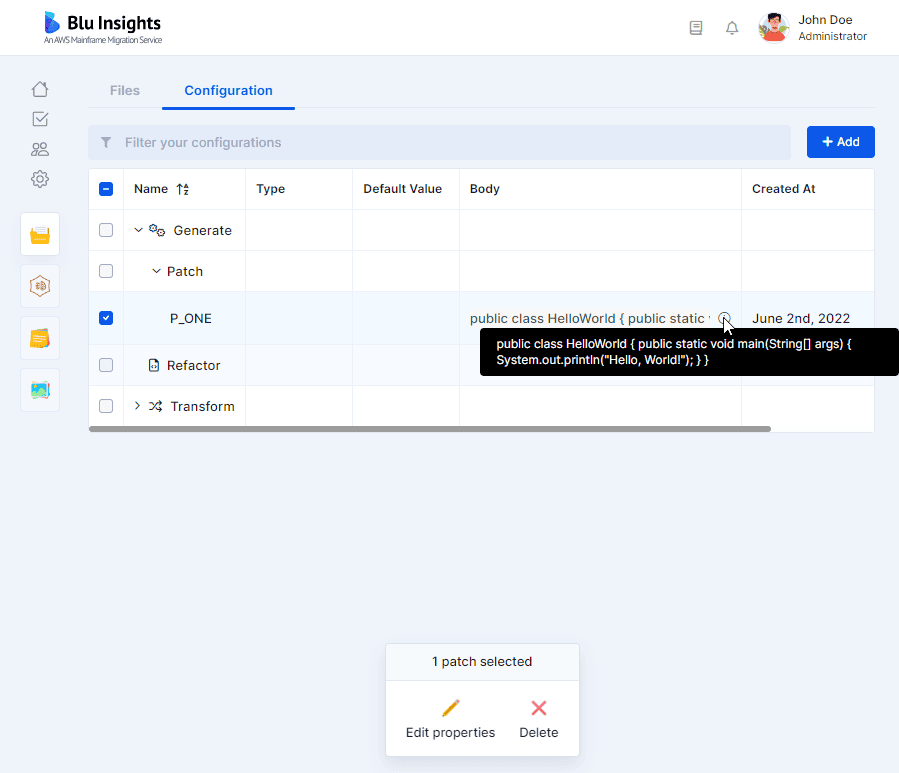
You can change the properties of a patch by selecting it on the table, then clicking on the “Edit properties” button at the bottom. The name and the body can then be changed in the displayed pop-up. At the end, click on “Save” to persist the modifications.
You can also delete a patch be selecting it and clicking on the “Delete” button.
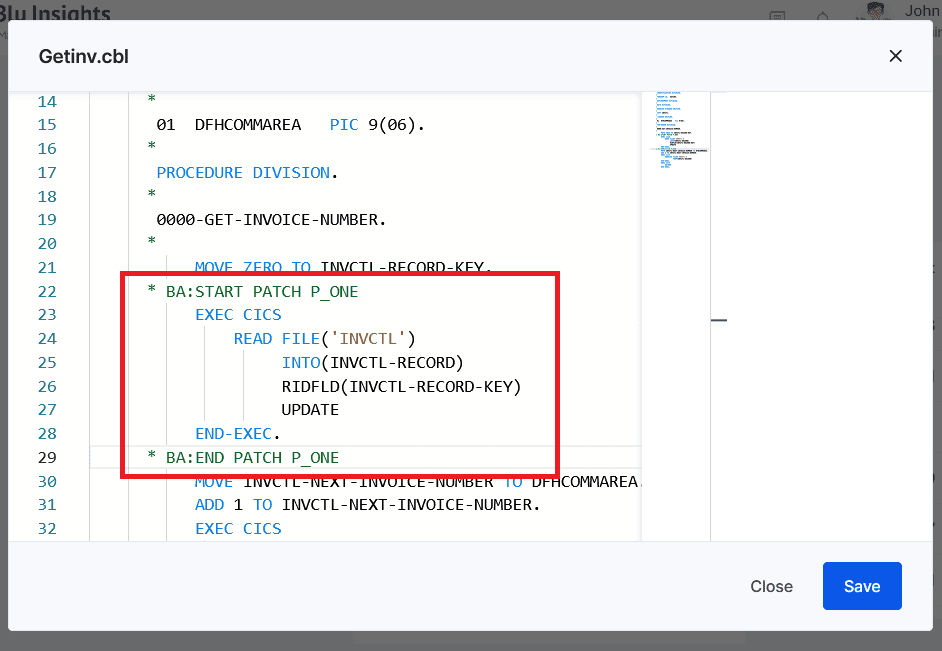
To patch a file, create a new version of this file and use the following pattern:
<comment> BA:START PATCH <PATCH NAME> legacy code which will be replaced by the patch content in the generated java <comment> BA:END PATCH <PATCH NAME>
where:
- <comment> is the comment pattern of the legacy file language (i.e. * for Cobol).
- PATCH_NAME is the name of the patch declared in the configuration (see above).
- BA:START PATCH and BA:END PATCH mark respectively the beginning and the end of the code which will be replaced by the patch content.
Patches located at the end of loops
This section is a quick trick to work with patches at the end of loops.
When patching something at the end of a loop, you may encounter an issue breaking you generated files. Looking at the concrete example bellow may help you understand what happen.
You want to apply the following patch to the code sample
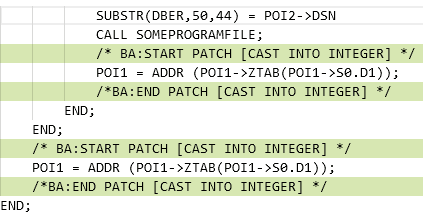
The generated java will be the following one. We can see here the error, the patch comment is never closed. This comes from an issue on comment propagation at the end of loops which is, for the moment, tricky to fix.
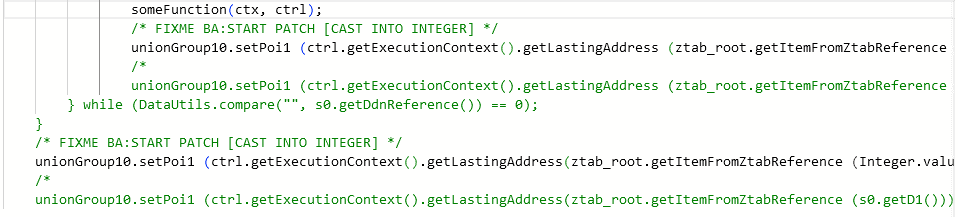
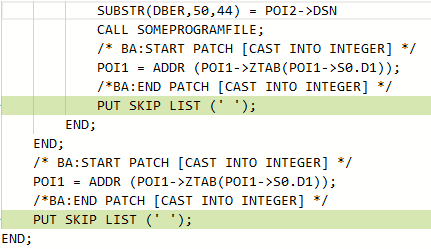
However, you can follow this workaround to overpass this issue. You have to combine 2 tricks:
- In the configuration, in generate property set, use
property.patchStrategyset toRELEASE. This will only print the patched code. - In your file, add a dummy statement (like
PUT LIST) between the command and the end of the loop.
Doing this, the comment won't be the last instruction at the end of the loop anymore. The generated code is not broken anymore.
Data Source configuration:
This feature allows you to configure the properties of your data sources. You can start configuring the data source by selecting the “Data Source” menu of the “Add” button.
A pop-up will appear to create a new data source configuration, which needs two items:
- name: a unique name for the data source.
- properties: the properties to configure for the data source.
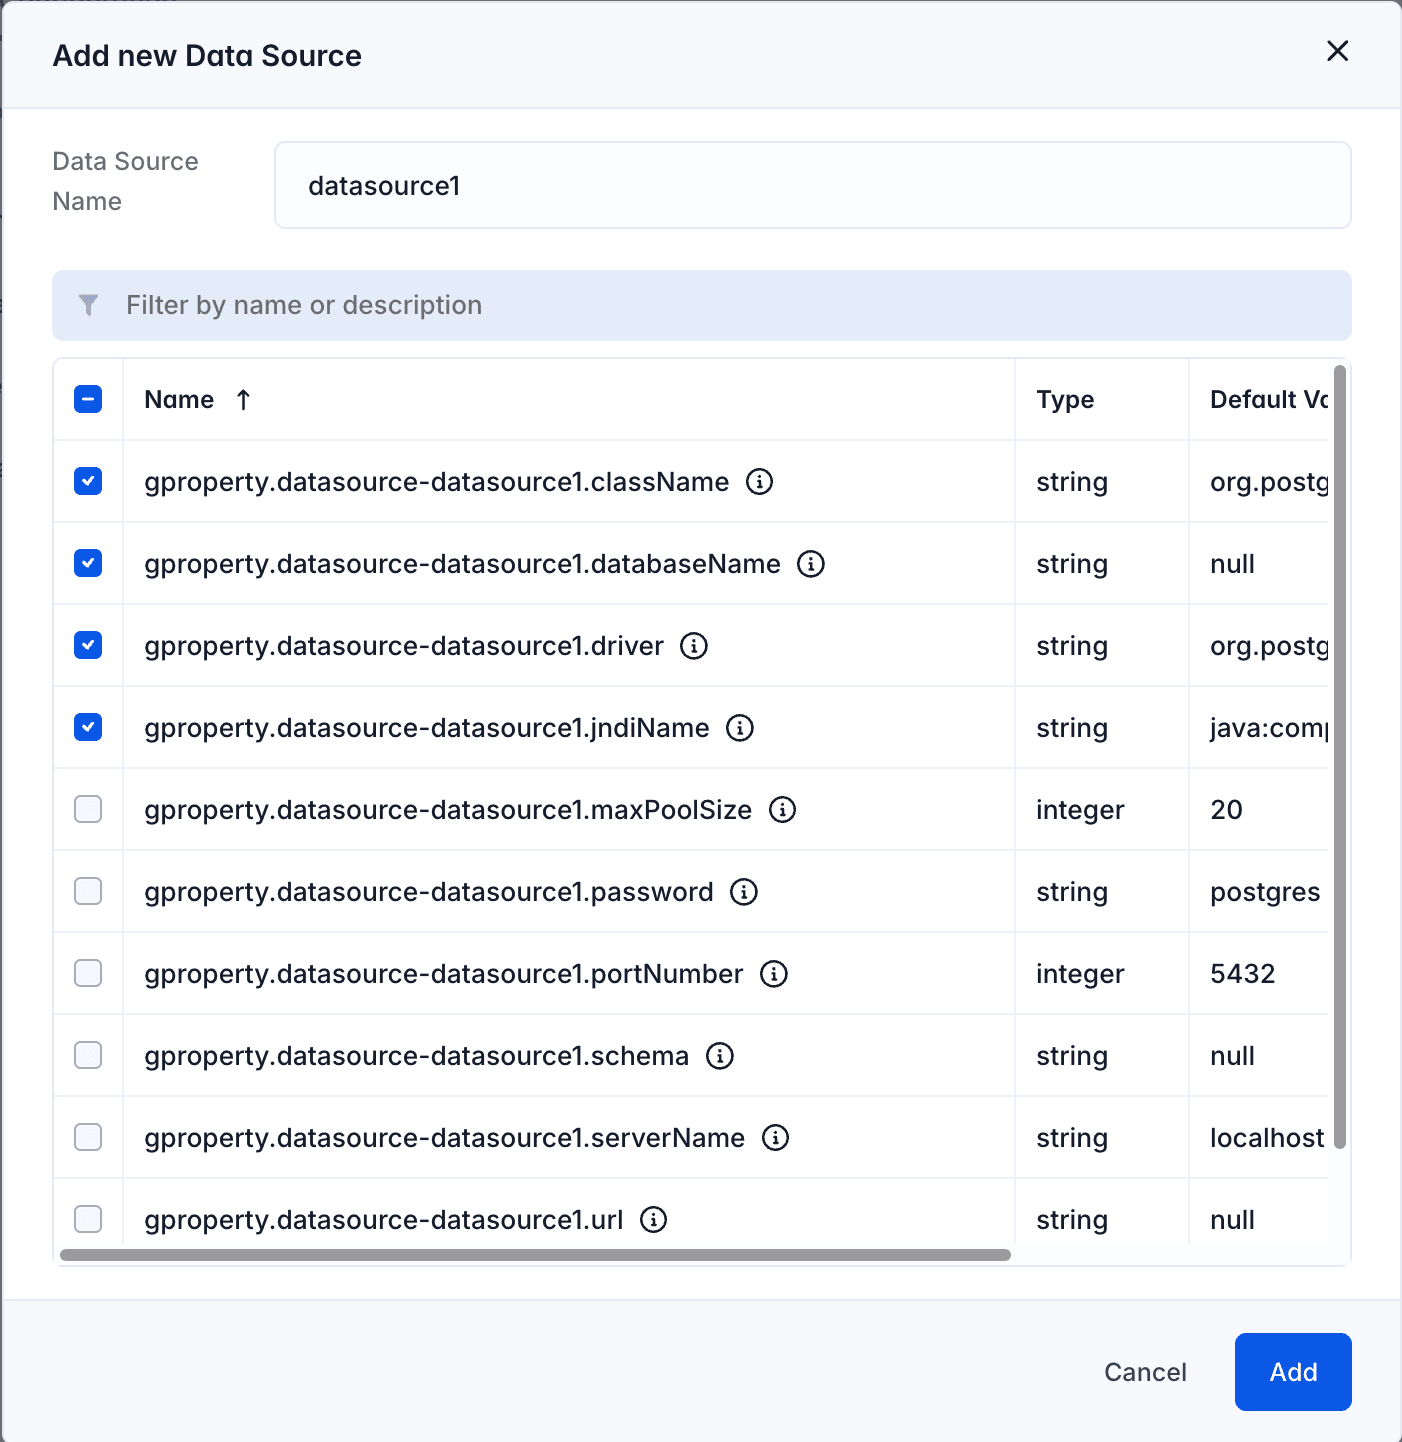
You can see your newly created data source under the “Data Source” section of the configuration table.
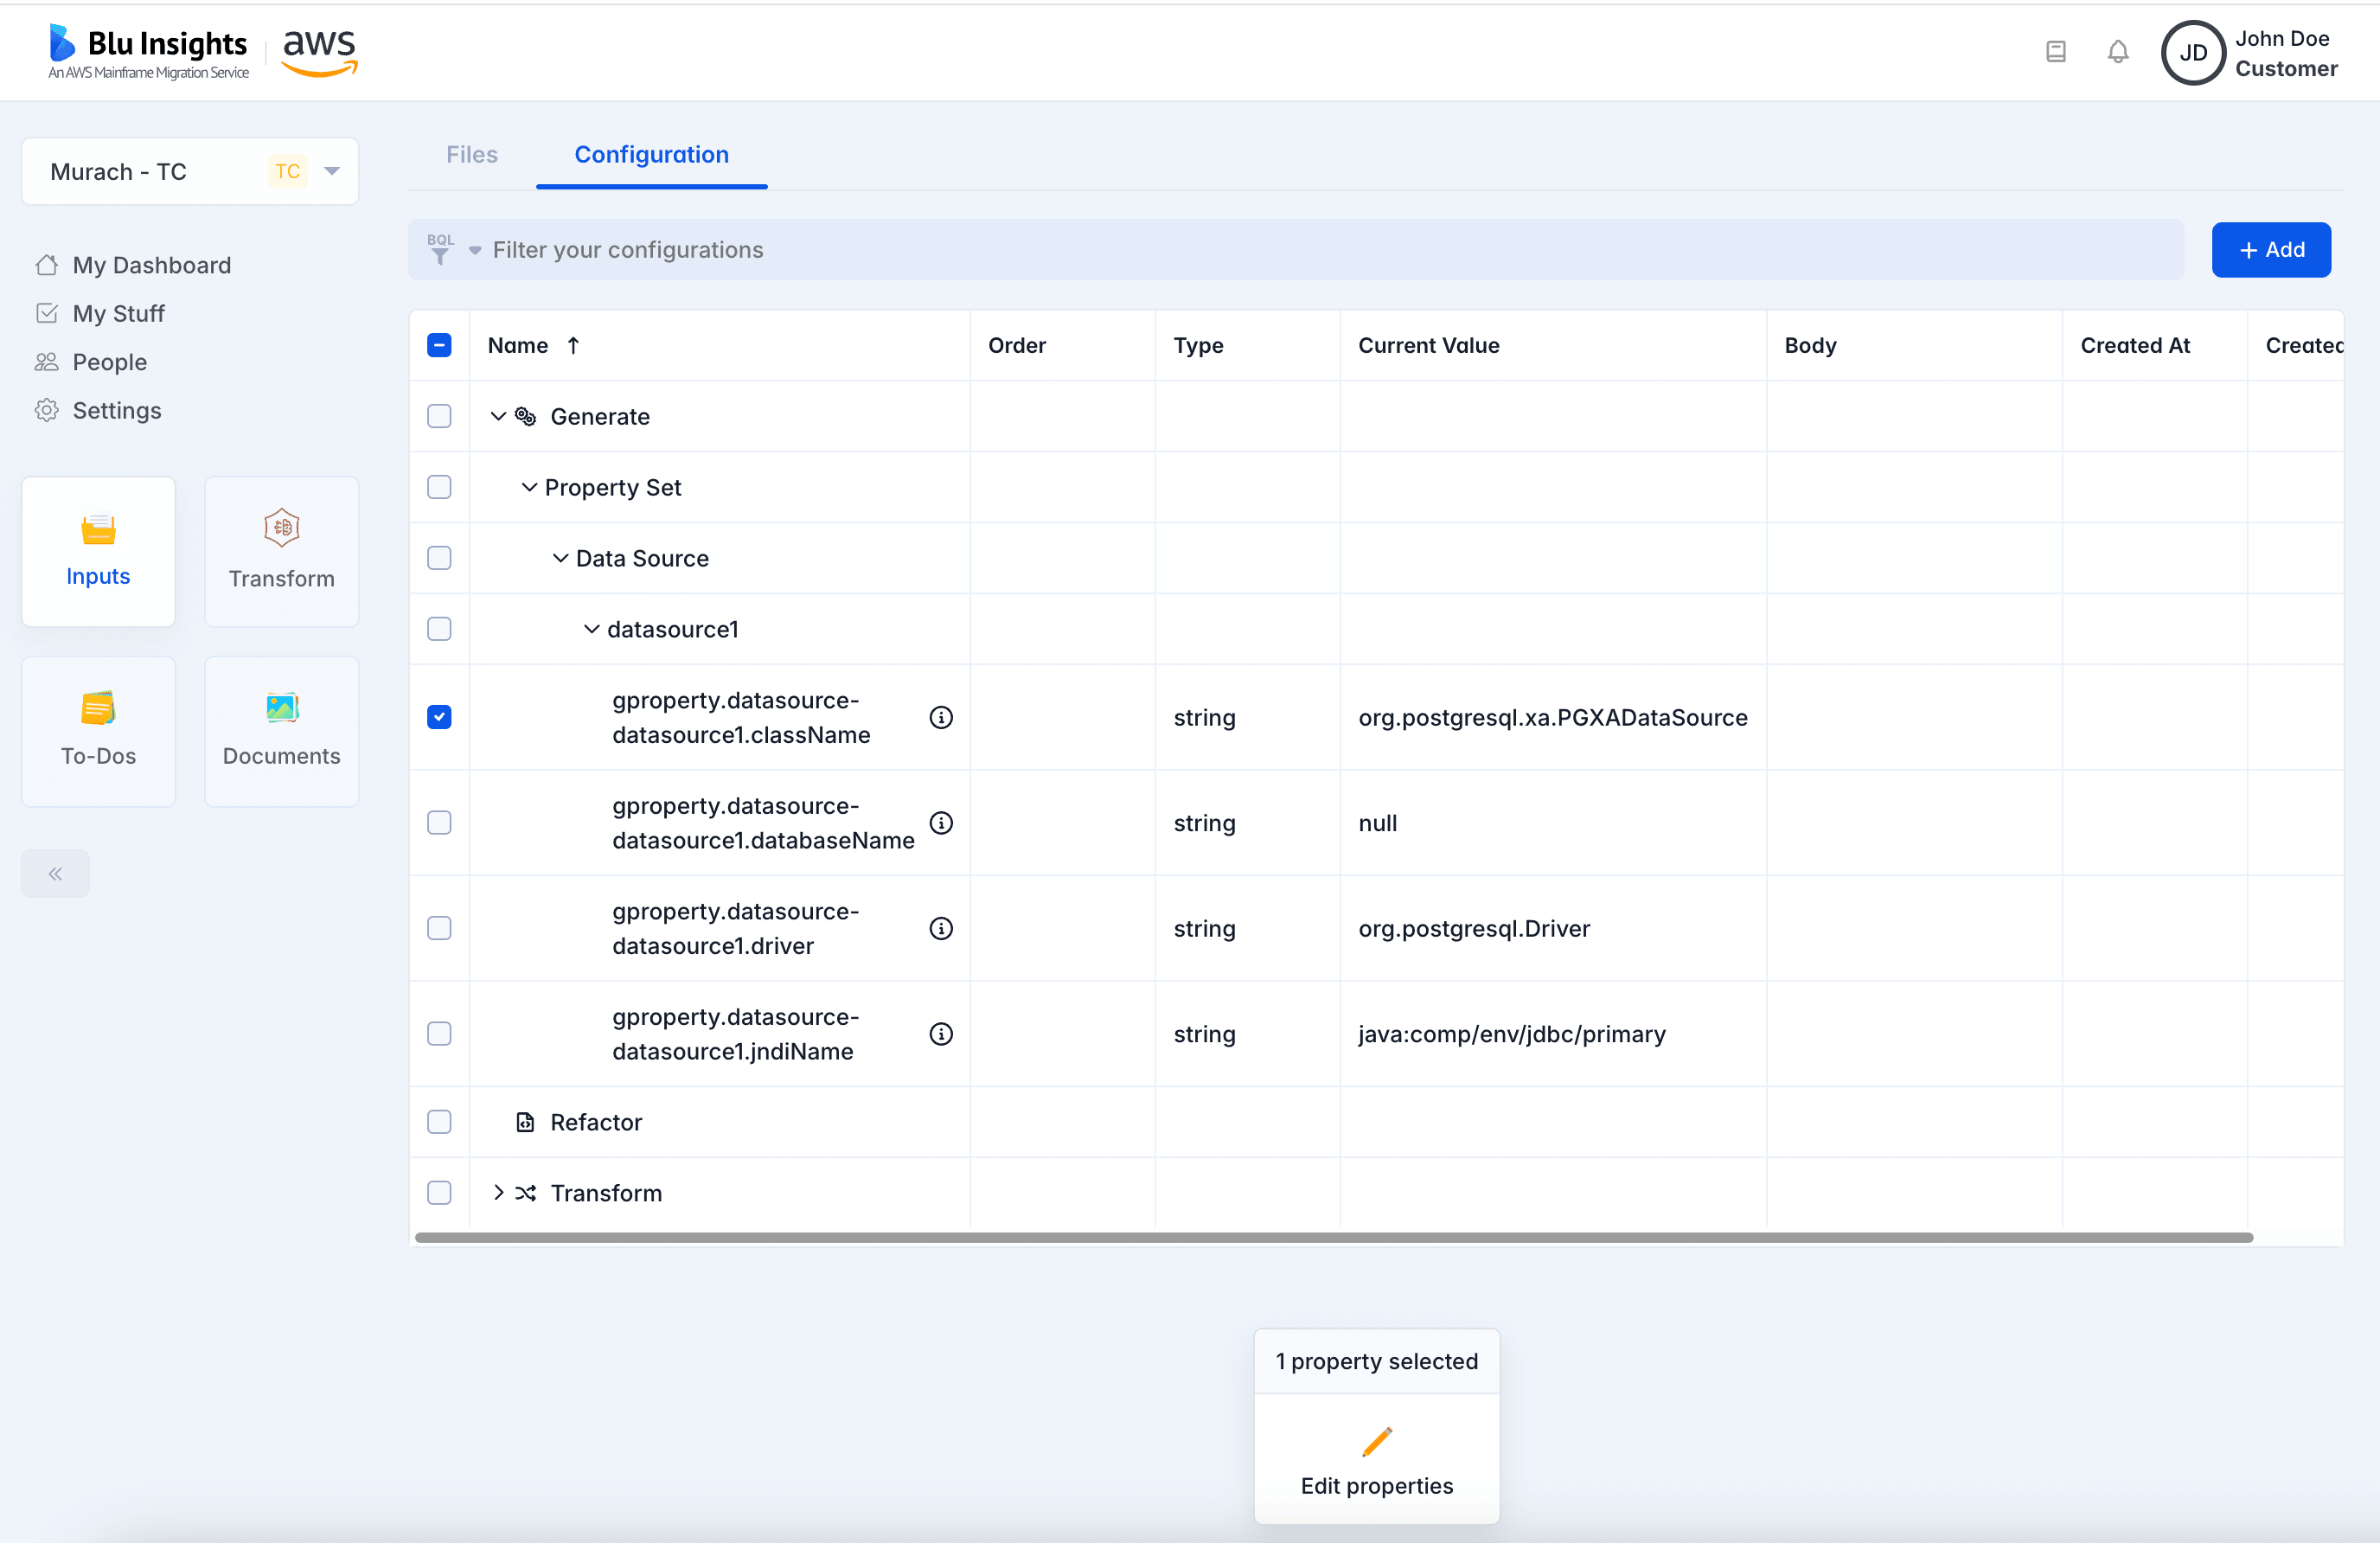
You can edit the value of the properties of the data source by selecting a property and clicking the “Edit properties” button at the bottom. Also, you can add or remove properties to the data source by selecting the data source and clicking the “Edit properties” button.
You can modify the properties of an existing data source in two ways:
- Edit Property Values: Select a property and click the “Edit Properties” button at the bottom to update its value.
- Add or Remove Properties: Select the data source and click the “Edit Properties” button to add new properties or remove existing ones.