Transformation Center Bundle
Overview
The Bundle is an optional step in the AWS Transform for mainframe refactor, activated from the Transformation Center project. It collects all required transformation outputs (modernized artifacts and configurations) from the Transform and Generate steps, generates the scripts and configurations for AWS Transform runtime component integration, pre-configures the database migration environment, and deliver a complete deployment setup as a single downloadable ZIP, ready to deploy.
The resulting package contains the modernized Java application, all database migration scripts and data, runtime server configuration and a ready-to-use Docker Compose configuration for local deployment.
Generate Bundle
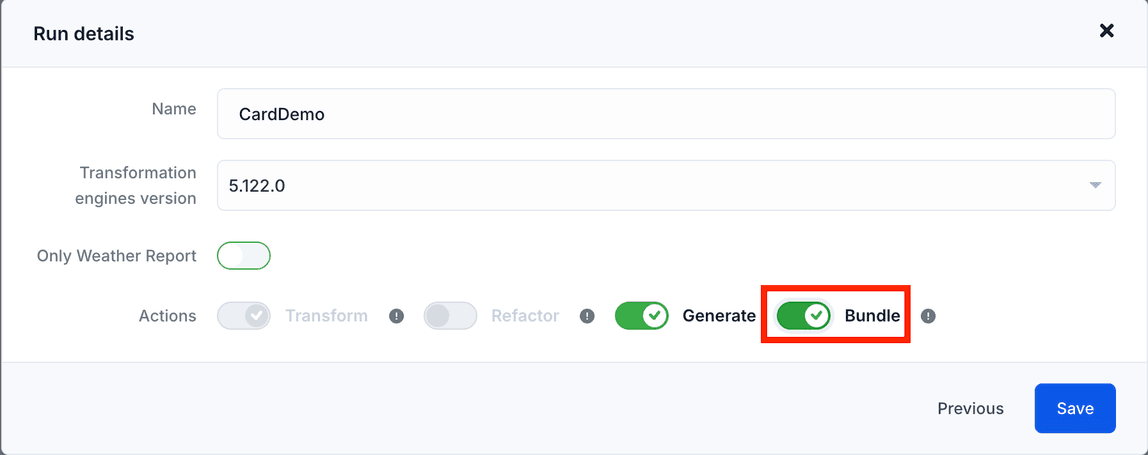
When choosing options of the transformation run, enable the Bundle action. Click the Save button
Note : Bundle action needs the Generate action to be enabled
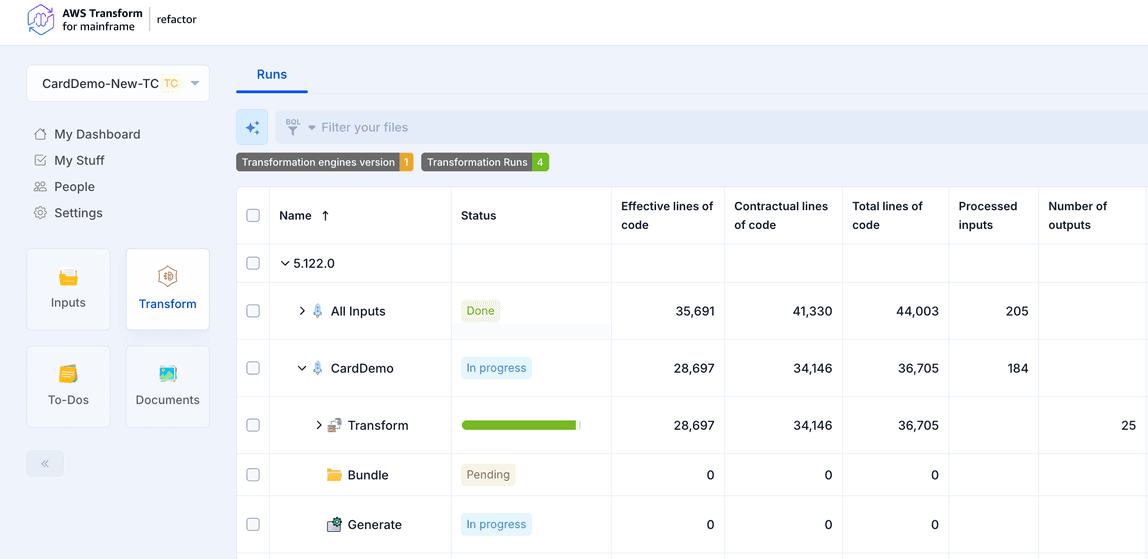
The run will launch automatically. You can open the Transform section to check the status:
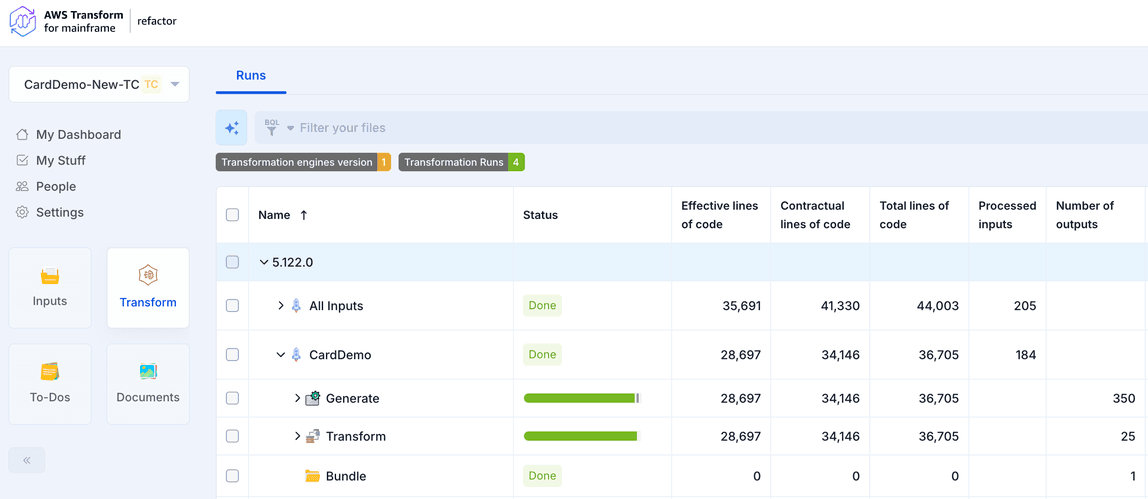
When complete, the Bundle run will display the status Done, as shown below:
Download Bundle
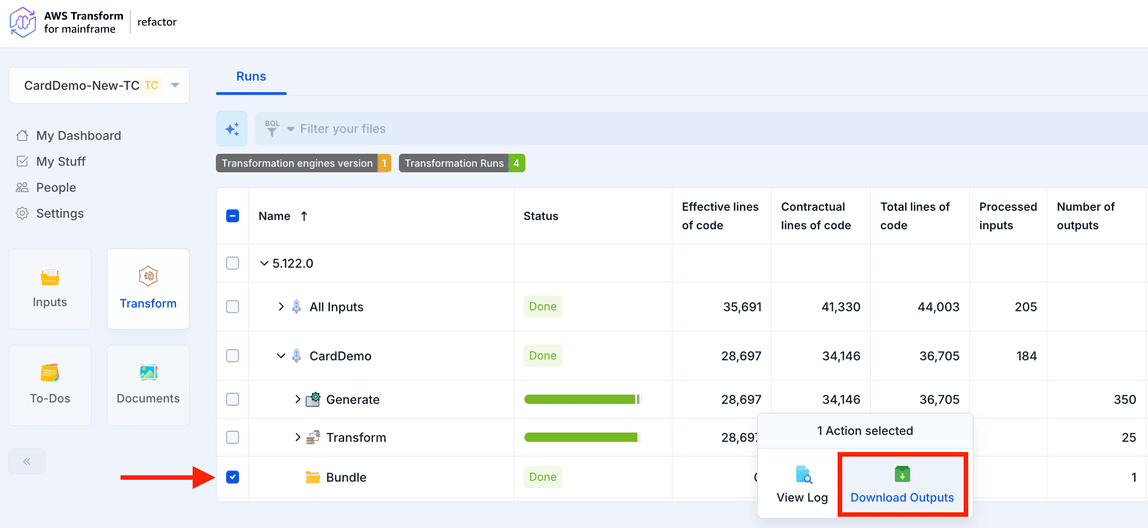
You can then select the Bundle Run and choose Download Outputs. A zip file will be downloaded.
Bundle package content
When you download the Bundle output, you get a ZIP file organized into these folders (where <project> refers to your application name, e.g., carddemo, myapp):
| Folder | What it contains | |
|---|---|---|
| 1 | <project>-application/ | Your modernized Java application (Maven project with all modules) |
| 2 | <project>-database/ | Database migration scripts and data for all required databases |
| 3 | <project>-server/ | Runtime configuration: Groovy batch scripts and VSAM dataset descriptors |
| 4 | <project>-deploy/ | A complete Docker Compose environment to run database migration and modernized application |
| 5 | report/ | An Excel report detailing Bundle processing status |
| 6 | status/ | Pipeline metadata (JSON) with metrics from all modernization steps |
Use Bundle
Prerequisites
- Docker and Docker Compose installed on your machine
- Valid AWS credentials with access to the S3 buckets hosting the AWS Transform for mainframe runtime and Data Migrator tool
Step 1 - Configure Your Credentials
Open the .env file in the <project>-deploy/ folder and fill in your AWS credentials:
AWS_ACCESS_KEY_ID=<your access key>
AWS_SECRET_ACCESS_KEY=<your secret key>
AWS_SESSION_TOKEN=<your session token>
You can also adjust the database settings if needed, but the defaults work out of the box:
DB_HOST=localhost
DB_PORT=5432
DB_NAME=<project>
DB_USER=postgres
DB_PASSWORD=postgres
Step 2 - Run the Database Migration
From the <project>-deploy/ directory, run:
docker compose --profile migration up --build
This will:
- Start a PostgreSQL database
- Download the AWS Data Migrator tool
- Create all required databases (primary, JICS, BAC, Bluesam)
- Run the schema creation scripts and load the data
Wait for all migration containers to complete successfully before moving on.
Step 3 - Start the Application
docker compose --profile application up --build
This will:
- Start PostgreSQL (if not already running)
- Download the AWS Transform for mainframe runtime and compile your application
- Deploy the backend on Tomcat (port 8080)
- Start the Angular frontend (port 4200)
Once all services are healthy, open your browser at http://localhost:4200
Customize Your Environment
Changing Ports
Edit the .env file to change any port:
BACKEND_PORT=8080        # Backend API
BACKEND_DEBUG_PORT=1045  # Java remote debug
FRONTEND_PORT=4200       # Web UI
DB_PORT=5432             # PostgreSQL
Changing the Runtime Version
The AWS_RUNTIME_VERSION variable in .env controls which version of the AWS Transform for mainframe runtime is downloaded and used. It must match the version used to generate the Bundle:
AWS_RUNTIME_VERSION=<version>
Changing the Legacy Encoding
If your mainframe source uses a different EBCDIC code page, update:
LEGACY_ENCODING=CP1047
Providing Data for the database migration
The database migration supports multiple data formats. To add or replace data, place your files in the appropriate subfolder under migration folder The Data Migrator will process all files found in these folders during the migration step.