Setup the Building Pipeline
Motivation
After deploying the Building Pipeline CDK scripts, you have a couple of tasks to achieve in order to get your AWS account ready.
Requirements for SDE DevOps Pipelines
- Read Setup the SDE DevOps Pipelines requirements before moving on this quip
Note: Read carefully the section
“Where do the pipelines fetch the sources?”of this document for further information
Verify the variables defined in the
/app/VARIABLESparameter store as well. Especially, DNS name, RTS DB name, and so on. Don’t modify paths.Create the RTS DBs
- Connect to
https://dws-manager.bluage.local - Login into dws-manager using login “devops” and password obtained from AWS Secrets Manager's key: “
rts/user/devops” - Create the database
User name: DEVOPS
Server name: rts`-app-master`
Server techno: <Select your techno>
Disk Creation: <Select your snapshot>
Instance type: <Select your instance type>
Note: The snapshot must not be blank otherwise the application won’t manage to connect to it
Run codepipeline-app-master
Once your Tomcat configuration files correct, you can run the codepipeline-app-master pipeline. The application will be deployed and you will be able to check it by opening your Windows EC2 and connecting to:
https://app.bluage.local/master
Optional - Issue on deployment
- If the deployment stage fails you may want to access the logs of your application to fix the runtime errors:
- Go to the EC2 console
- Connect to
ec2-<AWS_REGION>-app - Enter the following commands:
sudo su
docker ps -a # Get the container ID
docker logs -f <CONTAINER_ID>
- If your CodePipeline stage is not successful even when there are no errors in application logs and the container appears Healthy, check if the corresponding load balancer status is unhealthy
- Go to the EC2 console page
- On the left panel, click on Target Groups
- Click on your target group
ec2-targetgroup-app-<env> - If the registered target is unhealthy, click on the Health checks tab
- Click on Edit, and Advanced health check settings
- If your application is bigger than the common applications, that means your application needs more time for answering healthy so you need to increase one of these fields:
- Unhealthy threshold
- Timeout
- Interval
Configure the EFS
Info: Configure the EFS if you have test cases using or generating files
The EFS has been created by the CDK scripts. If you want to have access to it by using your windows instance, you have to provide a RSA key to your teammate. You can follow this document to WinSCP the EFS.
Once the .ppk file is created, give it to your teammates and modify the developer guide of your project referencing where this file is.
Note: Your teammates do not need to do the same step as you did. They just need to fill in the information in WinSCP and the
.ppkfile you created to connect to the EFS
Initialize Sonarqube
- Connect to your windows EC2 and go to
https://sonarqube.bluage.local - Connect using the credentials
admin/admin - Change the password by using the one generated in the secret manager
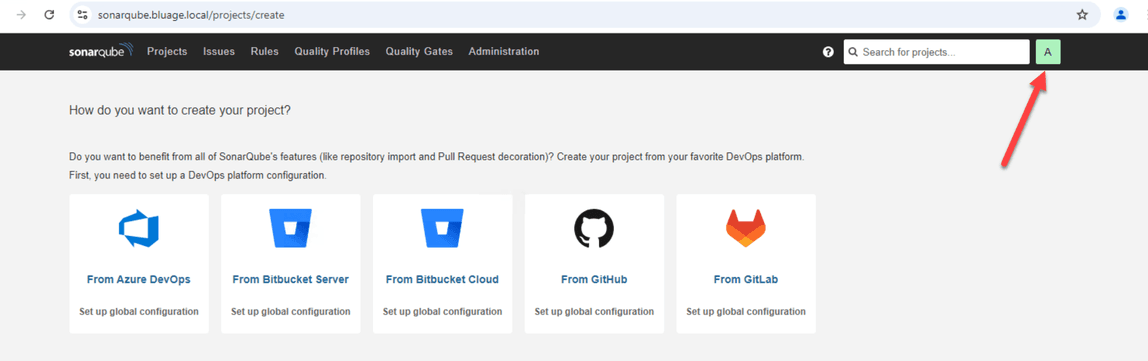
/sonarqube/admin - Let’s create a new Sonarqube token by clicking on your account avatar
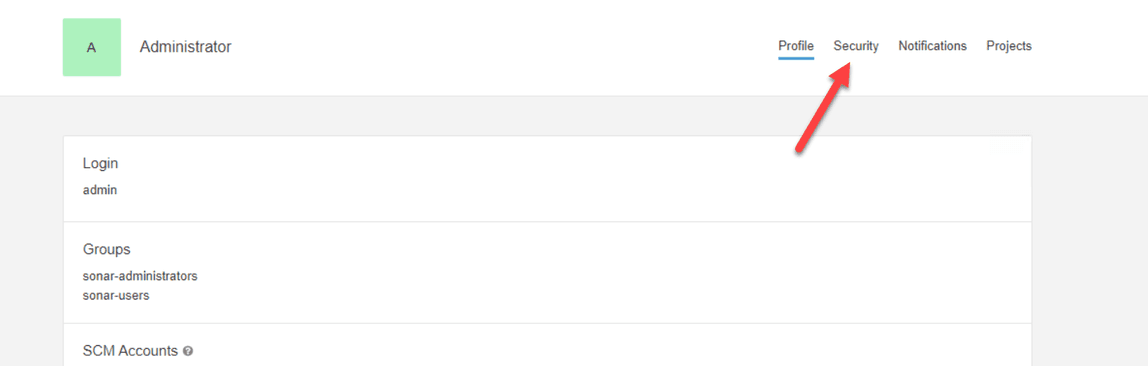
- Then click on the Security tab
- In Token name, type the name of your project. You will find the name of the project in the
/sonarqube/VARIABLESparameter store, copy theSONARQUBE_PROJECT_KEYvariable. - In Type, select Global Analysis Token and In Expires in select No expiration. Then click on Generate
Copy the Token and paste it in the
SONARQUBE_LOGINvariable of the/sonarqube/VARIABLESparameter store.Slack notifications
When the building pipelines ends, it triggers a lambda function sending a Slack message. First, you need to create a Slack Webhook. To do this:
- On Slack, create a new channel called
bluage-notifications-<PROJECT_NAME>in private - Once the channel created, click on View all members of this channel (see screenshot below)

- Click on Integrations and Add Automation
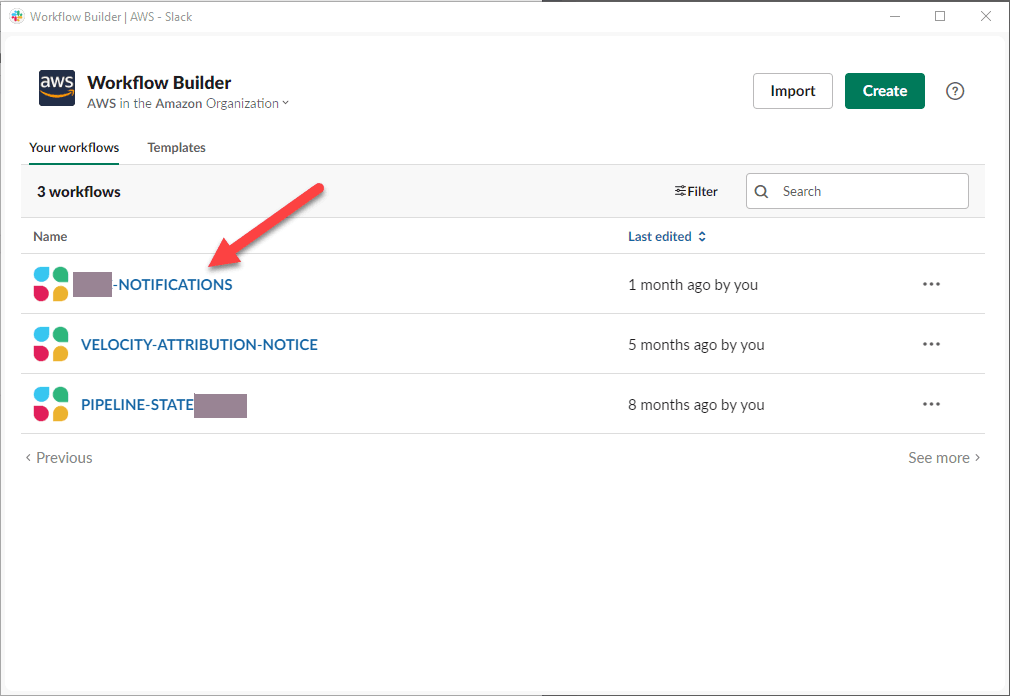
- A new window opens, click on Create and type the name of your webhook (e.g
<PROJECT_NAME>-NOTIFICATIONS), click on Next and then select Webhook - Click on Add Variable, the key is
messageand Data type isText. Click on Done and then Next - Click on Add Step, and then Send a message
- In the section Send this message to, select the new channel you created and in Message text, click on Insert a variable and select
message - Optional - You can also add
@herein Message text, if you want your notifications to notify everyone in the channel for each message - Click on Save
- Click on Publish and TADAAA. Your brand new webhook is created!
Now you need to go to the Parameter Store of your new account to modify some variables
- Open the Parameter Store in the AWS console
- Edit
/lambda/slack-notifications/VARIABLES - You can change the variables
TIMEZONEif is not the right one. Modify the empty variableSLACK_WEBHOOK_URLwith the URL of your webhook just created. - You can get your webhook URL by clicking on the name of your webhook on Slack (see screenshot below)
- Then click on the Edit button of the section Starts when an app or service sends a web request and click on the button Copy next to the Web request URL section.
Note: The timezone list is available here